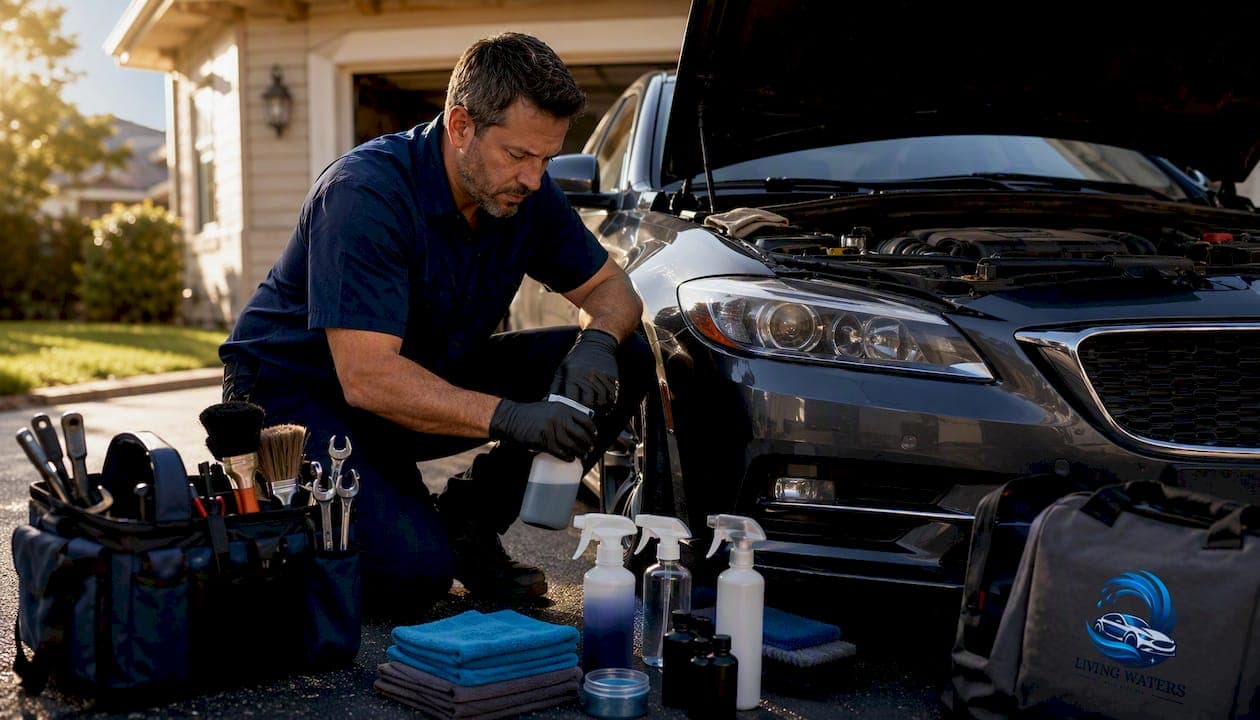
Engine bay detailing is the targeted cleaning, degreasing, drying, and protection of the engine compartment. Done correctly, it's completely safe and genuinely preventative. The process covers everything visible under the hood: the engine cover, plastic components, hoses, brackets, the underside of the hood, and the bay walls themselves.
Safety verdict: Safe for DIY when you follow the preparation steps below. The damage stories you've heard come from one mistake: blasting a hot engine with a pressure washer. The professional method is the opposite.
Core steps at a glance:
- Cool the engine (wait 20–30 minutes after driving)
- Cover the alternator, fuse box, battery terminals, and air intake
- Apply degreaser carefully by sections and agitate with brushes
- Rinse with low pressure, top to bottom
- Dry with compressed air, idle the engine briefly, then dress plastics and rubber
Time estimate: A quick wipe-down typically takes under an hour, while a full degrease, rinse, dry, and dress session takes slightly longer for most DIYers. A professional mobile service usually completes the job in a similar timeframe, offering less risk and often better results on heavily soiled bays.
Table of Contents
- What is engine bay detailing, and why does it matter?
- Is engine bay detailing safe? Key precautions you need to know
- What to prepare and which tools you need before you start
- How to detail an engine bay: step-by-step procedure
- How often should you detail the engine bay?
- Pro tips and common mistakes that separate good results from damage
- When does hiring a professional make more sense than DIY?
- Key Takeaways
- Why safety-first detailing is the only approach worth taking
- Living Waters Auto Wash LLC brings the engine bay detail to your driveway
- Useful sources and further reading
What is engine bay detailing, and why does it matter?
Engine bay detailing is a systematic process of cleaning, degreasing, and protecting the engine compartment to restore a factory-fresh appearance and reduce long-term degradation. It's not a mechanical service. Nobody opens the engine or touches anything sealed inside. Think of it as careful housekeeping for the space under your hood.
The practical payoff is real. A clean bay makes oil leaks, brittle hoses, and failing belts visible at a glance. Grease and grime act as insulation, trapping heat around components that run cooler when clean. And if you ever sell the car, a well-maintained engine bay signals that the owner actually cared for the vehicle, not just the paint.
Most drivers never open the hood except to check oil. That neglect lets road dust, salt residue, and oil film build up on rubber and plastic parts that dry out and crack when left unprotected. Detailing the engine compartment addresses all of that in one session.
Is engine bay detailing safe? Key precautions you need to know
Yes, a properly executed engine bay clean is safe for modern vehicles. The fear is reasonable but misdirected. Your engine bay already gets soaked every time you drive through rain. The components exposed to the weather are sealed, gasketed, or weather-rated to handle moisture.
The actual risk is narrow: high-pressure water forced directly into electrical connectors, the fuse box, alternator windings, or the air intake. That's where damage happens. The professional process is built entirely around eliminating that one risk.
Non-negotiable safety rules:
- Work only on a cool engine. Wait until the engine is cool to the touch before starting, typically requiring some time after driving.
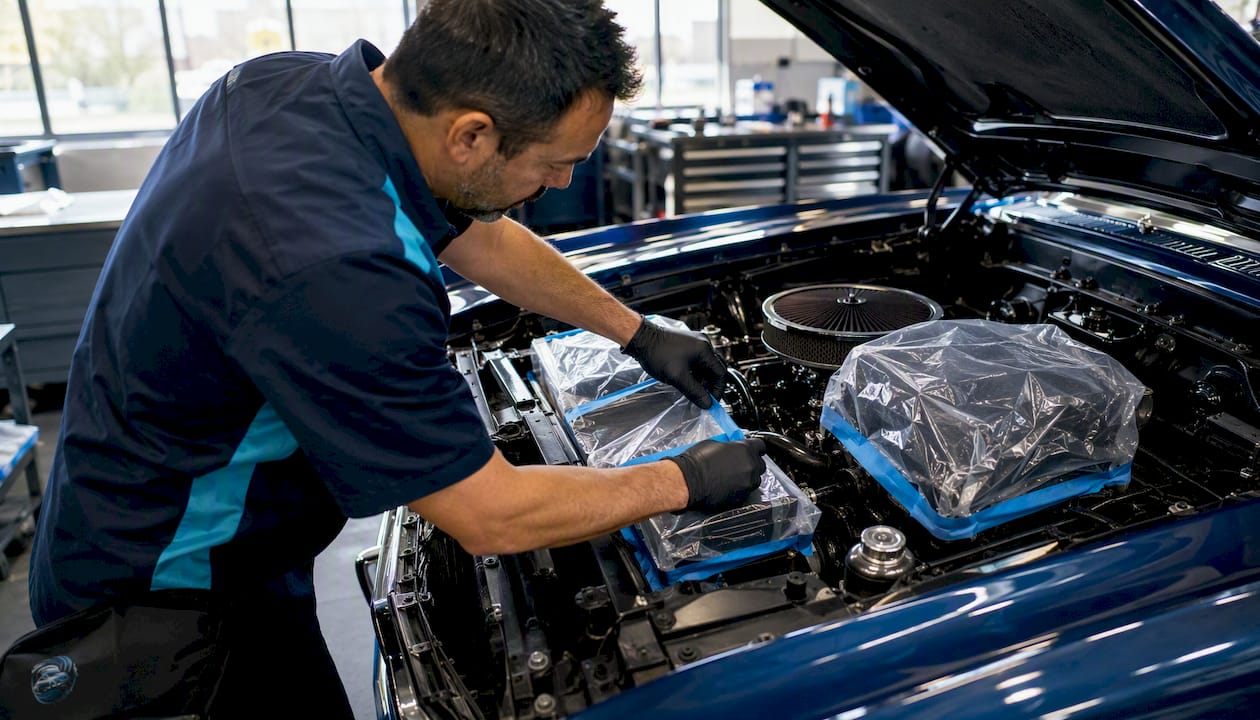
- Cover the alternator, fuse box, battery terminals, air intake, and any exposed connectors with plastic bags or tape before any liquid touches the bay.
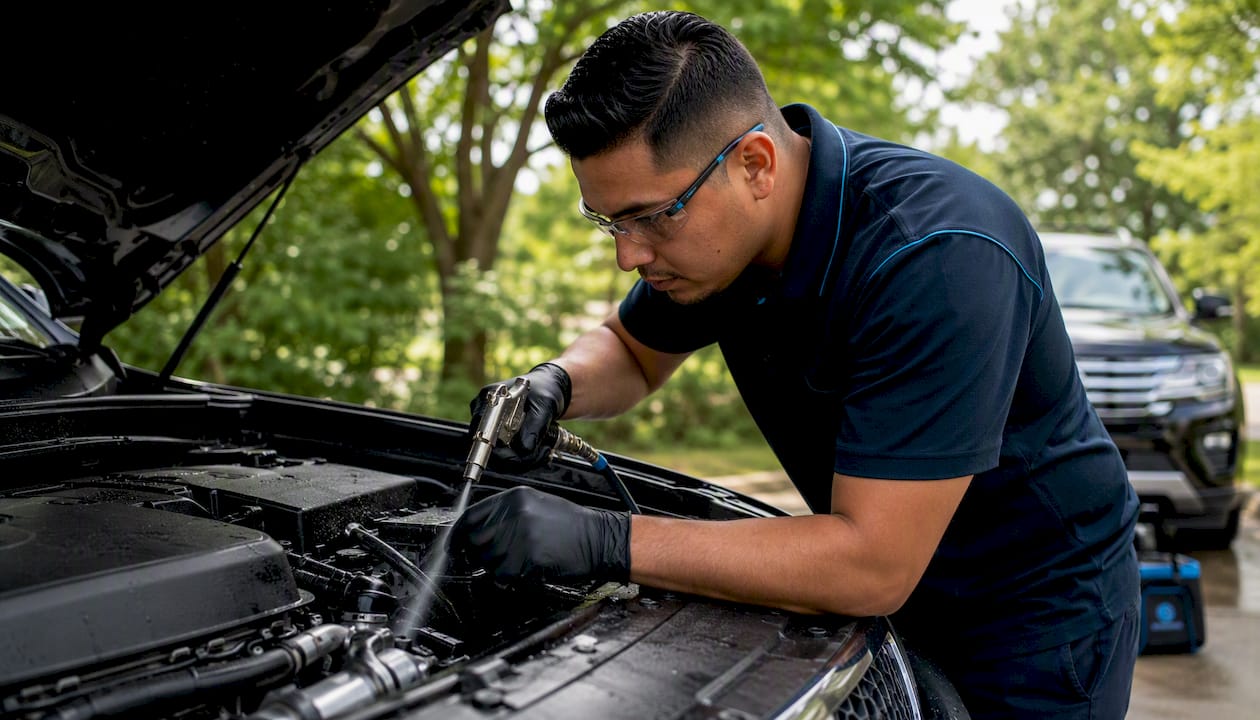
- Use low-pressure water only. A garden hose with a fan-tip nozzle is the right tool. Pressure washers should be avoided on modern engine bays.
- Never spray cold water on hot components. Thermal shock can stress metal and crack plastic.
When to skip the DIY entirely:
- Active oil or coolant leaks (cleaning a leaking bay is futile until the leak is repaired)
- Exposed aftermarket air intake filters that aren't waterproof
- Obvious damaged or frayed wiring with no protective sleeve
- Older vehicles with exposed distributors or non-weatherproof connectors
A clean engine bay is only as safe as the preparation that precedes it. Covering sensitive components and controlling water pressure accounts for nearly all professional success in engine detailing — product choice is secondary.
Pro Tip: If you're doing paid detailing work, photograph the engine bay before you touch it. Document any pre-existing leaks, damaged wiring, or cracked hoses. That documentation protects you and sets clear expectations with the vehicle owner.
What to prepare and which tools you need before you start
Gather everything before you open the hood. Stopping mid-job to hunt for a brush or a plastic bag is how mistakes happen.
Essential tools and supplies:
- All-purpose cleaner (APC) or dedicated engine degreaser
- Set of detailing brushes (stiff for heavy grime, soft for plastics and delicate surfaces)
- Microfiber towels, separated into cleaning and finishing sets
- Plastic bags, tape, or purpose-made covers for electrical components
- Garden hose with a fan-tip nozzle (low pressure)
- Compressed air or a leaf blower for drying
- Water-based protectant or dressing for plastic and rubber
- Nitrile gloves and safety glasses
Product guidance:
Use a water-based dressing for the finishing step on plastic and rubber. Water-based protectants provide a non-sticky, UV-resistant finish and don't attract dust the way silicone-based dressings do. For cleaning, a diluted APC or dedicated engine degreaser applied section by section gives you control over dwell time and prevents the product from drying before you can agitate it.
| Product Type | Purpose | Notes |
|---|---|---|
| Engine degreaser / APC | Lifts oil film, grease, and grime | Dilute per label; stronger for heavy buildup |
| Detailing brushes (2–3 sizes) | Agitate cleaner into crevices | Soft bristle for plastics, stiffer for metal |
| Microfiber towels | Wipe surfaces clean and dry | Keep cleaning and finishing sets separate |
| Water-based protectant | Dress plastic and rubber after cleaning | Avoids dust attraction vs. silicone |
| Compressed air / leaf blower | Remove pooled water from crevices | Critical before restarting the engine |
Workspace setup: Work in the shade. Direct sun heats surfaces and causes degreaser to flash-dry before you can agitate it. Remove any loose debris from the hood gap before opening it, so leaves and pine needles don't fall into the bay.
How to detail an engine bay: step-by-step procedure
Follow this sequence. Skipping steps or reordering them is where most DIY problems start.
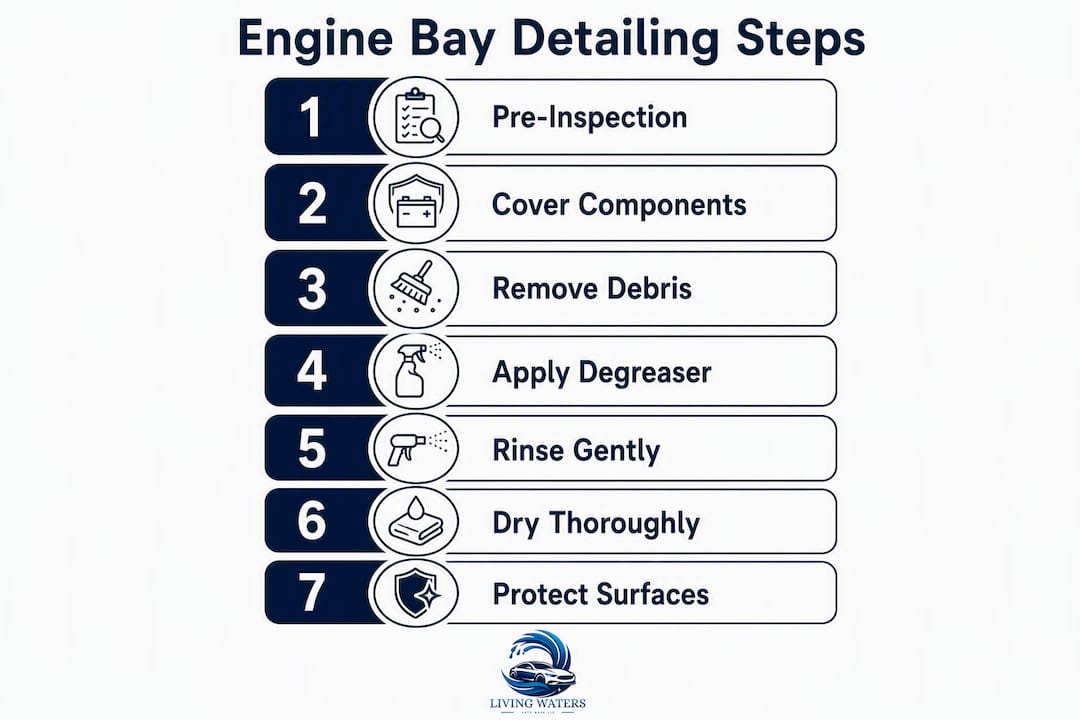
1. Pre-inspection (5 minutes) Open the hood and look before you touch anything. Check for active oil or coolant leaks, brittle or cracked hoses, and any exposed or damaged wiring. If you find an active leak, defer cleaning until the leak is repaired. Photograph what you see.
2. Cover sensitive components (5–10 minutes) Bag or tape the alternator, fuse box, battery terminals, air intake, and any open connectors. This step takes longer than people expect. Do it thoroughly.
3. Blow out loose debris (3–5 minutes) Use a leaf blower or compressed air to remove leaves, pine needles, and loose dirt before any liquid enters the bay. Work top to bottom.
4. Light pre-rinse (optional, 2–3 minutes) For heavily soiled bays, a brief low-pressure rinse loosens surface grime and helps the degreaser penetrate faster. Skip this on lightly soiled engines.
5. Apply degreaser section by section (10–15 minutes) Divide the bay into natural sections: left side, right side, center, and the underside of the hood. Spray one section, allow it to dwell for approximately 3 minutes, then agitate with brushes before moving to the next. Never let degreaser flash-dry on a surface.
Pro Tip: Clean the underside of the hood first. If you clean the engine compartment first, grime from the hood underside falls onto your clean work below.
6. Low-pressure rinse (5–10 minutes) Rinse top to bottom with a garden hose fan tip. Keep the nozzle at a distance from connectors and the fuse box. The goal is to carry loosened grime away, not to blast it off with force. Low-pressure rinsing and careful distance are what separate a safe clean from an electrical problem.
7. Dry with compressed air and idle the engine (10–15 minutes) Blow out pooled water from connectors, crevices, and the wiring harness with compressed air. Then remove your protective covers and start the engine. Let it idle for 3–5 minutes. The heat evaporates residual moisture from areas compressed air can't reach. Watch for any warning lights. If a light appears, shut the engine off and let everything dry further before restarting.
8. Apply protectant and finish (10–15 minutes) Once the bay is fully dry, apply a water-based protectant to all plastic and rubber surfaces using an applicator pad or a small brush for tight areas. Apply in thin layers. Excess product looks oily and attracts grime. Wipe any painted surfaces under the hood with a detail spray for a clean finish.
Total DIY time: 45–90 minutes depending on how dirty the bay is.
How often should you detail the engine bay?
Industry guidance recommends a full engine bay detail 1–2 times per year for most drivers. That cadence prevents the kind of buildup that degrades rubber and plastic over time.
Increase frequency if:
- You drive in coastal areas with salt air exposure (South Florida included)
- Your vehicle sees muddy or off-road conditions regularly
- You notice visible grease buildup or oil film accumulating faster than usual
- You take frequent short trips that don't fully warm the engine, which accelerates moisture buildup
| Condition | Recommended Frequency |
|---|---|
| Normal daily driving | 1–2 times per year |
| Coastal / salt-air exposure | 2–3 times per year |
| Off-road or muddy conditions | Every 3–4 months |
| Quick wipe-down maintenance | Every 1–2 months |
A quick wipe-down between full details takes 20–45 minutes and keeps the bay manageable. It's far easier to maintain a clean bay than to restore a neglected one.
Pro tips and common mistakes that separate good results from damage
Mistakes that cause real problems:
- Using a pressure washer on connectors or the fuse box
- Spraying degreaser on a hot engine (product flashes dry before you can agitate it)
- Skipping the intake and alternator covers
- Using silicone-based dressings that attract dust and leave a greasy film
- Over-applying protectant to mechanical parts where it can drip onto belts or pulleys
- Using the same microfiber towel for cleaning and finishing (you'll reintroduce grime)
- Starting the engine while connectors are still wet
Pro-level habits worth adopting:
- Divide the bay into natural sections and work one at a time. Spray the whole bay at once and the degreaser dries in the far corner while you're still working the near side.
- Use a small staining brush or artist brush to apply protectant into tight areas, then blow out the excess with compressed air.
- Keep a separate set of towels for the engine bay. Engine grime is stubborn and will contaminate paint if you mix your towel sets.
Pro Tip: Apply protectant in two thin coats rather than one heavy one. The first coat soaks in; the second coat gives you the uniform finish. Wipe off any excess immediately — pooled dressing in crevices looks worse than no dressing at all.
When does hiring a professional make more sense than DIY?
Some situations genuinely call for a pro. Knowing the line saves you time, money, and the risk of an electrical fault.
Hire a professional when:
- You find an active oil or coolant leak during pre-inspection
- The bay has complex aftermarket electrical work or exposed non-weatherproof wiring
- You don't own a compressed air source or a low-pressure hose setup
- The vehicle is a luxury or collector car where any moisture risk is unacceptable
- You simply don't have 90 minutes and the right tools on hand
What a professional service typically includes:
- Formal pre-inspection with documentation and photos
- Controlled masking of all sensitive components
- Professional-grade degreaser applied by hand, section by section
- Low-pressure rinse calibrated to the bay's condition
- Compressed-air drying followed by engine idle verification
- Water-based protectant on all plastic and rubber surfaces
- Post-service check for warning lights before returning the vehicle
For readers interested in how pros approach protective treatments, the luxury vehicle detailing guide covers documentation and protective technique in detail.
Mobile services add a layer of convenience that traditional shops can't match. A mobile detailer comes to your driveway, requires no vehicle transport, and typically works without needing your water or power supply.
| Service Level | Typical Price Range | Typical Time |
|---|---|---|
| Light wipe-down | $50–$75 | 20–45 min |
| Full degrease + rinse + dress | $100–$175 | 45–90 min |
| Heavy commercial engine bay | $200+ | 90+ min |
Pricing from industry sample data; actual quotes vary by provider and vehicle condition.
Pro Tip: Ask any detailer whether they photograph the bay before starting. A pro who documents pre-existing conditions is protecting both of you. If they skip that step, it's worth asking why.
Key Takeaways
Engine bay detailing is safe and effective when you cool the engine, cover sensitive components, use low pressure, and finish with a water-based protectant.
| Point | Details |
|---|---|
| Definition and safety | Engine bay detailing cleans, degreases, and protects the engine compartment; it's safe when you follow preparation steps. |
| Core safety rule | Always work on a cool engine and cover the alternator, fuse box, intake, and connectors before applying any liquid. |
| Recommended frequency | Detail the engine bay 1–2 times per year under normal conditions; more often in coastal or off-road environments. |
| DIY time expectation | A full degrease, rinse, dry, and dress session can take up to about an hour or more; a quick wipe-down is shorter and suitable for maintenance. |
| When to call Living Waters Auto Wash LLC | Active leaks, complex electrical setups, or no tools on hand are clear signals to book a mobile professional. |
Why safety-first detailing is the only approach worth taking
Most of the anxiety around engine bay cleaning comes from conflating two completely different methods: the old-school pressure-washer blast and the controlled, hand-applied process that professionals actually use. They aren't variations of the same thing. They produce opposite outcomes.
The preparation step is where the real work happens. Covering the alternator and fuse box takes ten minutes. Skipping it can cost you an afternoon diagnosing an electrical fault. That asymmetry is worth taking seriously, whether you're doing this yourself or handing it to someone else.
One thing that gets underestimated: the finishing step matters as much as the cleaning step. A bay that's been degreased but left unprotected will re-soil faster and leave plastics exposed to UV degradation. Choosing a UV-resistant protectant for the plastic and rubber surfaces is what makes the result last beyond the next rainstorm.
The honest answer on DIY versus pro: if you have the tools, the time, and a bay that passed the pre-inspection, do it yourself. If any of those three are missing, a mobile service is a straightforward call.
Living Waters Auto Wash LLC brings the engine bay detail to your driveway
Skipping the drive to a shop is the whole point. Living Waters Auto Wash LLC provides fully mobile engine bay detailing across Boca Raton, Pompano Beach, Coral Springs, Parkland, and Palm Beach County, with no water or power hookup required from you. The team arrives equipped, performs a pre-inspection with documentation, masks all sensitive components, and uses professional-grade water-based products throughout.

For drivers dealing with salt-air buildup from coastal South Florida roads, or anyone who simply doesn't have 90 minutes and the right gear, this is the practical alternative to DIY. The service covers the full process: degrease, low-pressure rinse, compressed-air dry, engine idle check, and protectant finish. Five-star reviews back the results.
View the full engine bay detailing service or book a mobile visit for Boca Raton and surrounding areas.
Useful sources and further reading
The resources below back the safety guidance, product recommendations, and step-by-step process covered in this article.
| Resource | Why It Helps |
|---|---|
| Engine Bay Detailing Guide – Detailed Image | Frequency guidance and pre-inspection workflow from a professional detailing supplier |
| How to Detail an Engine Bay – DETAILERMADE | Safety precautions, thermal shock warning, and cost ranges |
| How to Clean Your Engine Bay – Chemical Guys | Product dilution guidance and water-based dressing recommendations |
| How to Clean Your Engine Bay | Compressed-air drying and engine-idle verification steps |
| Engine Bay Detailing Guide – Muscle Hand Car Wash | Low-pressure rinse technique and connector safety |
| Living Waters Auto Wash – Engine Bay Service | Mobile engine bay detailing in Boca Raton, Pompano Beach, Coral Springs, Parkland, and Palm Beach County |
| Keep Your Car Clean Between Details | Practical maintenance tips for keeping the bay clean between full details |