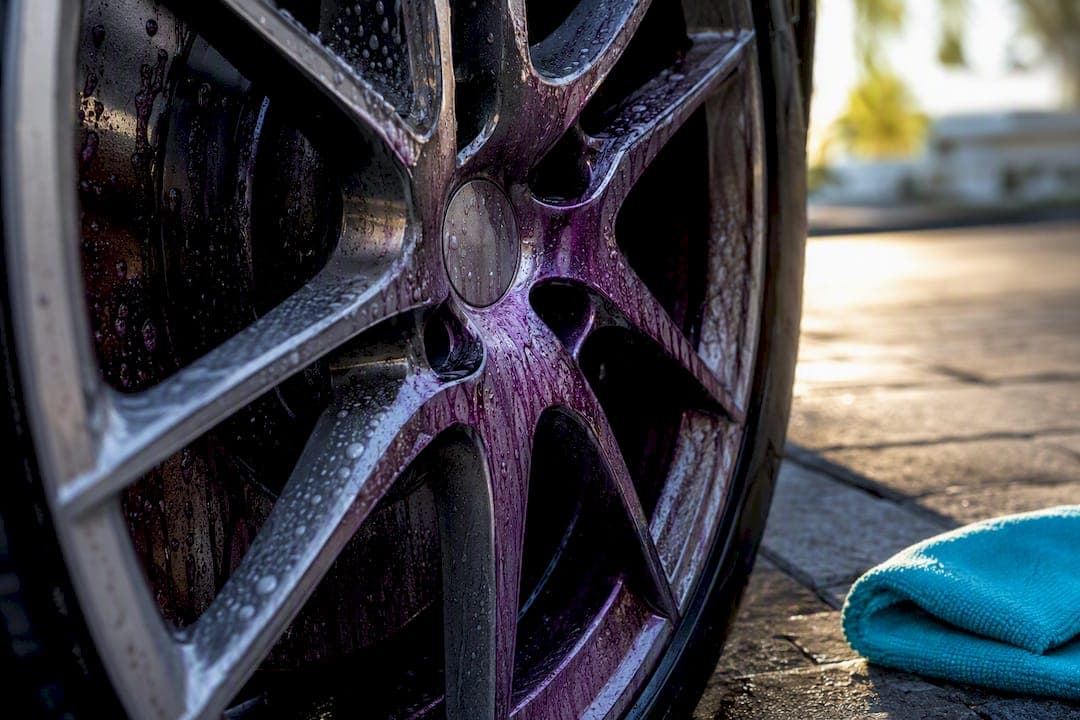
Grab an iron-reactive or pH-balanced wheel cleaner, spray it on cool wheels, let it dwell for the time listed on the bottle, then agitate gently with a soft brush before rinsing and drying. That handles light to moderate dust in one pass. For baked-on grime, repeat the chemical cycle or use a controlled soak instead of reaching for a wire brush or razor blade, both of which chew into clear coat. Finish with a wheel sealant so next month's cleanup takes half the effort.
TL;DR:
- Iron-reactive cleaners change color during dwell time, indicating when embedded brake dust has been effectively loosened.
- Rinsing wheels before applying chemical cleaners prevents scratching or swirl marks by removing loose debris.
- Soak techniques with plastic wrap prolong chemical contact on baked-on dust, reducing the need for aggressive scrubbing.
- Professional-grade iron removers and clay treatments from detailers can better correct heavily contaminated wheels than DIY methods.
- Applying a wheel sealant or ceramic coating after cleaning greatly reduces future brake dust buildup and simplifies maintenance.
Table of Contents
- Step-by-Step Process for Light to Moderate Brake Dust
- Which Wheel Cleaners and Tools Actually Remove Brake Dust
- How Do You Remove Baked-On Brake Dust Without Damaging Wheels?
- Prevention: Sealants, Coatings, and a Maintenance Schedule
- When a Mobile Detailer Should Handle Brake Dust Instead of You
- What Actually Matters in Brake Dust Removal (And What Gets Overstated)
- Book Living Waters Auto Wash for Wheel Decontamination and Sealant Application
- Sources
Step-by-Step Process for Light to Moderate Brake Dust
Most wheels don't need a war plan. They need the right order of operations, done while the metal is cool and the chemistry has time to work.
Start by parking in the shade, or at least waiting until the wheels aren't hot to the touch. Spraying cleaner on sun-baked metal causes it to flash dry before it can break down anything, which turns a five-minute job into a stained mess. Gloves and eye protection aren't optional theater here. Iron removers and degreasers are formulated to react with metal particles, and that same chemistry irritates skin and eyes if it splashes back off a wheel face.
Here's the sequence that actually works, in order:
- Rinse first. Hose down each wheel to knock off loose grit and dust before any product touches the surface. Skipping this step means you're dragging sharp brake particles across the clear coat with your brush instead of floating them off, which is how swirl marks happen.
- Apply the cleaner. Coat the wheel face, barrel, and lug area evenly. A pH-balanced cleaner suits painted or clear-coated finishes; an iron-reactive formula targets embedded metal specifically and often changes color, usually shifting to purple or red, as it reacts with contamination.
- Let it dwell. Follow the label's dwell window, typically 1 to 5 minutes depending on the product. Never let it dry on the wheel. If you see it turning chalky or drying at the edges, rinse immediately rather than waiting it out.
- Agitate gently. Use a soft-bristle wheel brush on flat faces, a barrel brush for the inner lip, and a small detailing brush for lug-nut recesses and tight spokes. Let the chemical do the lifting; the brush is there to loosen residue, not scrub it off by force.
- Rinse thoroughly. Every trace of cleaner needs to go, especially from behind spokes where runoff pools. Leftover product left to dry can etch or discolor certain finishes over time.
- Dry completely. A microfiber towel prevents water spots and gives you a clear look at whether more dust remains.
- Repeat if needed. One cycle handles most weekly buildup. Heavier contamination sometimes needs a second pass rather than a longer dwell time on the first.
Tools worth keeping in the trunk or garage shelf:
- A dedicated soft wheel brush (never the same brush used on paint)
- A barrel brush with a bent handle for reaching behind spokes
- Small detailing brushes for lug nuts and tight corners
- Several microfiber towels set aside only for wheels
- A pressure washer, if available, for the initial rinse
Basic soap and water lifts light dust just fine on a weekly wash, but once contamination has had a few days to bond, AutoZone's guidance points out that you'll need a cleaner formulated to break down embedded iron, and sometimes more than one cycle to fully clear it.
Pro Tip: Watch the color change on an iron-reactive cleaner instead of the clock. If it's still reacting and shifting color after your dwell window, give it another minute before you rinse. Chasing the reaction, not the timer, tells you when the cleaner is actually done working.
Which Wheel Cleaners and Tools Actually Remove Brake Dust
Not every bottle labeled "wheel cleaner" does the same job, and grabbing the wrong one is how people end up with hazy or stained finishes.
pH-balanced cleaners are the safest default for painted, clear-coated, and most factory alloy wheels. They lift road grime and light dust without stripping sealants or attacking clear coat. If you're not sure what finish you're working with, this is the category to start in.
Iron-reactive removers are built specifically for embedded brake dust, the metal particles that physically bond to the surface rather than sitting on top of it. These products change color as they react, which gives you a visual read on whether they're actually working. Road & Track's testing found that color-change formulas tend to pull embedded particles loose more effectively than standard cleaners, cutting down on how much scrubbing you need to do afterward.
Degreasers handle the oily film that often rides along with brake dust, particularly on wheels that see a lot of highway driving. Clay bars with a lubricant finish the job on surface contamination that survives the wash, smoothing out texture you can feel but not always see.
Matching the product to your wheel material matters more than most people realize:
- Painted or clear-coated wheels (the majority of factory wheels): stick to pH-balanced or labeled-safe iron removers, never anything acidic.
- Chrome: tolerates a wider range of cleaners but still suffers under abrasive pads or steel wool.
- Polished or bare aluminum: the most finish-sensitive category, prone to oxidation if you use anything caustic.
One manufacturer example worth noting: Sonax's wheel cleaner is formulated as pH-neutral with a visible color-change indicator, and the product instructions specifically warn against letting it dry on the surface, a detail that applies to nearly every iron remover on the shelf, not just that one.
A quick reality check on cost: a bottle of quality iron remover runs somewhere in the $10 to $20 range and lasts months of weekly washes. Compare that to a wheel refinishing job after clear coat gets pitted from years of vinegar-and-scrub-brush shortcuts, and the math favors the right chemical every time.
Skip household acids, oven cleaner, or anything labeled for masonry. They're strong enough to strip contamination fast, which is exactly why they're strong enough to damage a clear coat too.
How Do You Remove Baked-On Brake Dust Without Damaging Wheels?
Dust that's been sitting for weeks or months behaves differently than fresh buildup. It bonds harder, and it doesn't respond to a single quick cycle.
The most effective escalation is a soak technique: saturate paper towel strips with an iron-reactive cleaner, press them onto the worst spots, and cover with plastic wrap to keep the chemical from evaporating. AllRotors documents this dwell-extension method as a way to give the cleaner hours instead of minutes to break the bond, which matters because baked-on dust often needs sustained contact, not stronger chemistry.
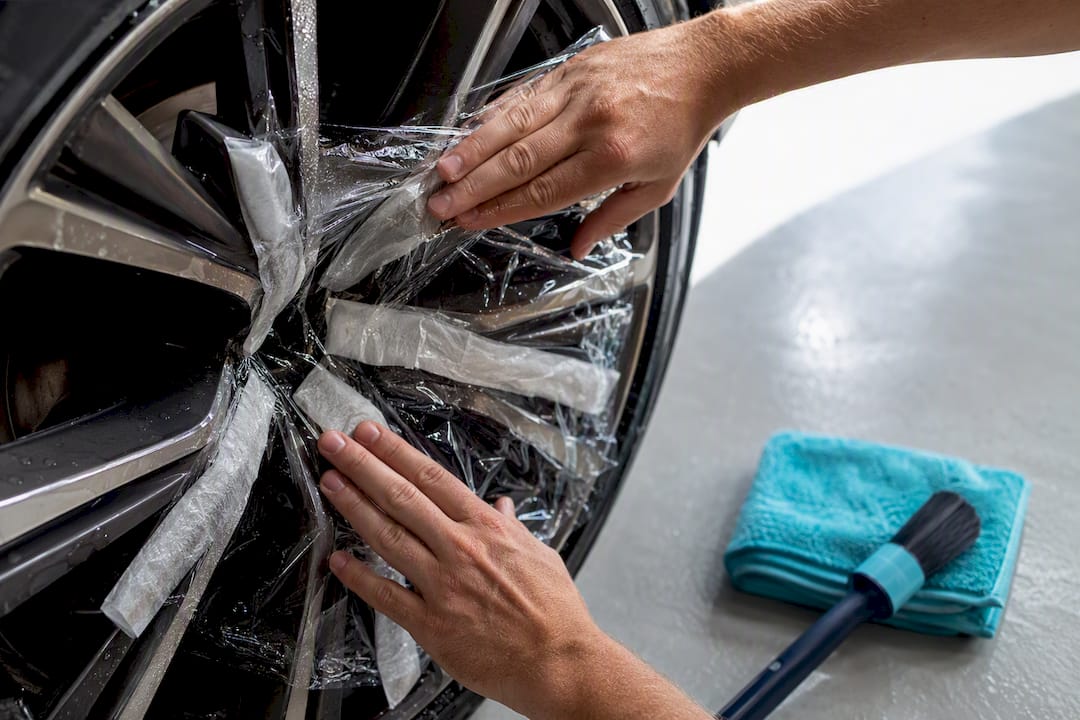
On vertical or inverted wheel faces, work in small sections at a time rather than soaking the whole wheel at once. That keeps the saturated towels from sliding off and prevents cleaner from pooling and drying on hot metal edges before it's done working.
For remaining texture after a soak, a clay bar or clay mitt with a slick lubricant spray lifts what chemical alone won't. Glide it in straight lines, never circles, and fold to a clean section the moment it picks up grit.
What to avoid entirely:
- Wire brushes or steel wool, which scratch clear coat almost immediately
- Razor blades, which gouge rather than lift
- Drill-mounted buffing pads at high speed, which generate heat and swirl marks fast
Detailing sources are consistent that mechanical force is the wrong tool for a chemical problem. Pitting from aggressive scraping shows up as tiny dull spots or a rough texture you can feel with a fingernail, and once it's there, no cleaner brings the finish back.
Pro Tip: If you've run three soak cycles and the discoloration hasn't budged, stop. At that point you're likely looking at etched clear coat rather than surface dust, and continued scrubbing only makes the damage worse.
Prevention: Sealants, Coatings, and a Maintenance Schedule
The fastest way to reduce future scrubbing is to stop metal particles from bonding to the wheel in the first place.
A wheel sealant creates a sacrificial barrier between the clear coat and airborne brake dust. Powerstop's maintenance guidance notes that a sealed wheel lets dust rinse away with plain water in many cases, instead of requiring a full chemical cycle every time. Ceramic coatings do the same job with a longer lifespan, often lasting many months versus a shorter duration for spray sealants, at a higher upfront cost.
A workable cadence looks like this:
- Weekly: quick rinse or wipe-down to keep dust from accumulating
- Monthly: full cleaner cycle with brushes, as described above
- Every few months: reapply sealant per the product's own instructions
Brake pad choice plays into this too. Ceramic pads generate noticeably less visible dust than semi-metallic pads, so a pad swap at your next brake job is worth asking your mechanic about if wheel cleaning has become a weekly headache.
Run your hand over the wheel face during each cleaning pass. Any roughness that wasn't there last month, or a dull patch that doesn't restore with polish, means you're catching early pitting before it spreads. For more on layering protection across the whole exterior, see how detailing protects paint beyond just the wheels.
When a Mobile Detailer Should Handle Brake Dust Instead of You
DIY makes sense when dust is light to moderate, you've got the right brushes and a proper cleaner on hand, and you're fine repeating a short cycle if the first pass doesn't finish the job.
Hire a pro when deposits have been baked on for months, you're seeing early pitting, or you simply don't have three hours to spend on soak cycles across four wheels. A mobile detailer also brings industrial-grade iron removers that aren't sold at retail, along with clay and polish capability for surface correction DIY tools can't match.
What a professional visit typically adds:
- Controlled, monitored soak techniques scaled to how bad the contamination actually is
- Access to stronger, professional-grade iron removers matched to your specific wheel finish
- Clay and polish steps to correct texture without risking the clear coat
- Sealant or coating application done correctly the first time, which extends the gap before the wheels need attention again
What Actually Matters in Brake Dust Removal (And What Gets Overstated)
Most advice on this topic obsesses over which specific cleaner to buy. That's the wrong fixation. The real variable is dwell time, and specifically whether you're patient enough to let chemistry do the work instead of muscling through it with a brush. A $12 bottle used correctly, with full dwell and a gentle agitation pass, outperforms a $30 bottle scrubbed in after 15 seconds.
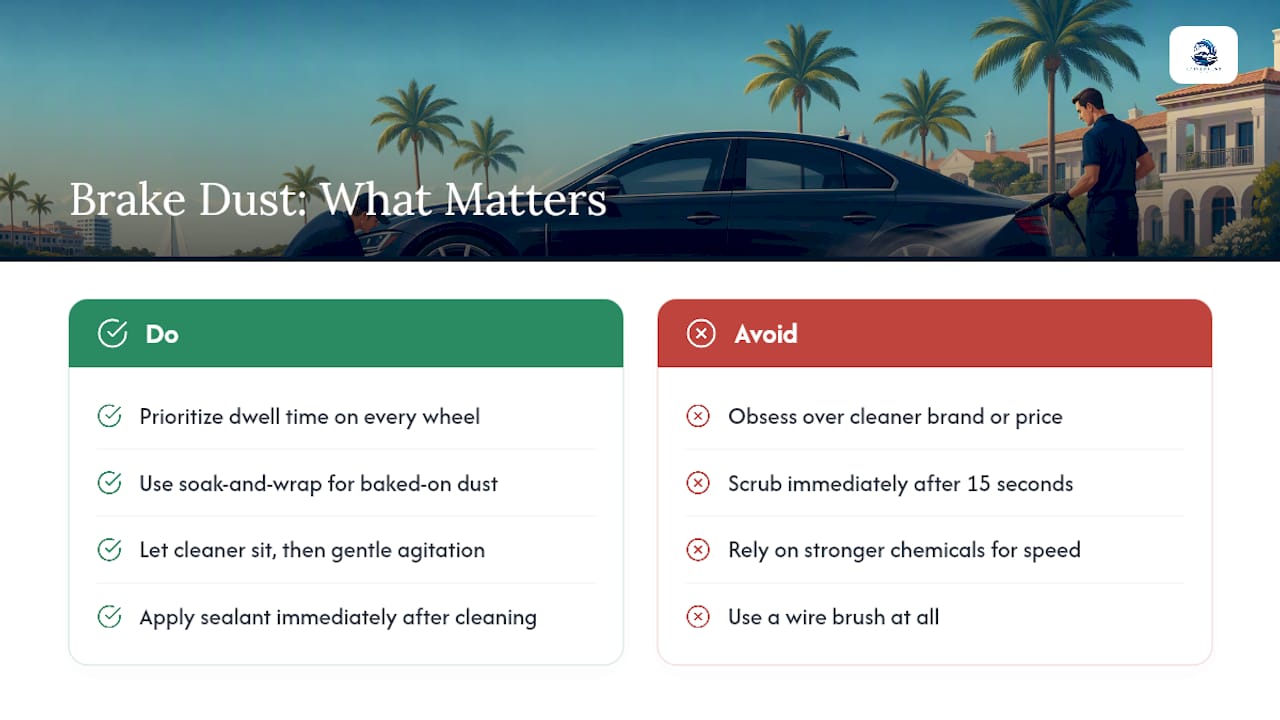
The soak-and-wrap technique for baked-on dust deserves more attention than it gets. It's slower and more tedious than a quick spray-and-rinse, which is exactly why most guides skip past it in favor of stronger chemicals. Stronger chemicals aren't the answer. Longer, controlled contact time is.
If you take one thing from this, prioritize dwell over aggression, every time, on every wheel. Skip the wire brush entirely. And once the dust is off, put a sealant on before you forget, because that single step is what turns next month's cleaning into a five-minute task instead of another soak cycle.
— Living
Book Living Waters Auto Wash for Wheel Decontamination and Sealant Application
Skipping the soak-and-scrub routine entirely is the real advantage of going mobile. Living Waters Auto Wash LLC brings professional-grade iron removers, clay treatment, and sealant application directly to your driveway or office lot, with no water or power hookup needed on your end.

The service covers full wheel decontamination, from initial rinse through iron-reactive treatment and a protective sealant coat that makes future dust rinse off faster. It's available throughout Boca Raton, Pompano Beach, Coral Springs, Parkland, and Palm Beach County, and most wheel-focused visits wrap up well within an hour, since the team arrives already set up and doesn't need to hunt for a hose or outlet. For fleet vehicles dealing with dust buildup across multiple units, the fleet wash service covers recurring maintenance on a schedule that fits your operation. If your wheels have gone past the point of a weekend DIY fix, or you'd simply rather not spend a Saturday soaking paper towels in cleaner, book a visit and let a team handle the decontamination and protection in one appointment.
Sources
- Brake dust causes, cleaning & prevention | Powerstop
- How to reduce brake dust | R1 Concepts (blog)
- How to Remove Brake Dust from Wheel Rims | AutoZone DIY
- Brake dust explained — which brake pads create more dust? | AllRotors blog
- The best car wheel cleaners tested | Road & Track