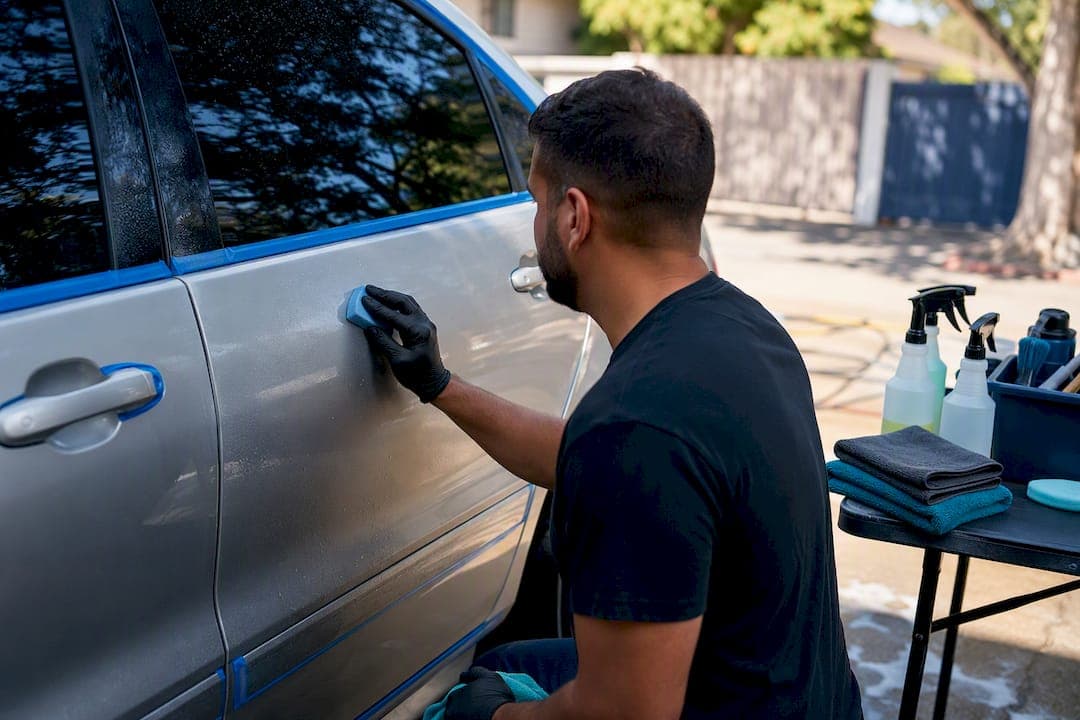
The fix is a sequence, not a single product: wash, decontaminate with an iron remover and clay, run a test spot, cut with compound, refine with polish, wipe the panel with isopropyl alcohol to confirm the haze is really gone, then protect immediately. Light oxidation on a daily driver often responds to a single compound and polish pass in an afternoon. Moderate oxidation across a whole car usually requires more extensive effort with a dual-action polisher. Heavy, chalky, single-stage oxidation sometimes can't be corrected at all. Before touching a panel, run a 2 foot by 2 foot test spot with the least aggressive product you own, and escalate only if it fails.
- Wash with a two-bucket method and dry completely
- Decontaminate with iron remover, then clay
- Test spot on a small section before committing
- Cut with compound, then refine with polish
- Wipe with diluted isopropyl alcohol to check for hidden haze
- Protect with wax, sealant, or ceramic within the hour
Key Takeaways
Exterior oxidation correction succeeds when you decontaminate first, test spot before cutting, use the least aggressive product that works, and protect the surface immediately after polishing.
| Point | Details |
|---|---|
| Follow the full sequence | Wash, decontaminate with iron remover and clay, test spot, compound, polish, IPA wipe, then protect. |
| Test spot before committing | Run a 2 foot by 2 foot test on the mildest pad and product before working a whole panel. |
| Know the correction limit | If color transfers to the pad or clear coat looks milky, stop and consider a repaint instead. |
| Verify with an IPA wipe | Diluted isopropyl alcohol strips polish oils so you can see if haze truly disappeared. |
| Protect within the hour | Bare corrected paint oxidizes faster, so apply wax, sealant, or ceramic right away. |
| Call a pro when needed | Living Waters Auto Wash LLC handles on-site correction across Palm Beach County without water or power hookups. |
Table of Contents
- What Causes Exterior Oxidation and How to Spot It
- What Tools and Products Do You Need for Oxidation Correction?
- Step-by-Step Oxidation Correction Workflow
- When Does Oxidation Correction Stop Working?
- When Should You Hire a Professional Detailer?
- How Do You Prevent Oxidation From Coming Back?
- A Mobile Detailer's Take on Doing This Right
- Prefer to Book a Pro for Your Oxidation Correction?
- Frequently Asked Questions
- Sources
What Causes Exterior Oxidation and How to Spot It
Oxidation happens because ultraviolet light and airborne oxygen slowly break down the resin binder in your clear coat and paint. That binder is what holds pigment and gloss additives in a smooth, reflective layer. Once it degrades, the surface turns rough at a microscopic level, which is why light scatters instead of reflecting cleanly. The result is the dull, hazy, or chalky look most owners describe as "the paint just looks old."
There's a real difference between fade, chalking, and clear-coat failure, and mixing them up wastes time and product. Fade is a gradual dulling that correction can often fix. Chalking is heavier oxidation where a white or gray residue actually rubs off on your hand or a cloth. Clear-coat failure is different again: the top layer is separating or peeling, and no amount of polishing brings it back.
Check your car under strong, raking light, ideally late afternoon sun or a handheld inspection lamp held at a low angle. Run these checks before you buy a single product:
- Wipe a section with a clean microfiber towel and look for chalky residue
- Look for a hazy "cloudy" reflection instead of a sharp mirror image
- Run your fingertip lightly across the panel and feel for roughness
- Do a tiny test rub with polish on a pad and see if color transfers
Pro Tip: Inspect panels that get the most sun exposure first, the hood, roof, and trunk lid. They oxidize faster than vertical panels like doors, so they're the most reliable early warning sign.
What Tools and Products Do You Need for Oxidation Correction?
You don't need a professional detailing bay, but you do need the right categories of gear, not just whatever polish is on sale. Start with a two-bucket wash kit and a pH-neutral shampoo, since a poor wash reintroduces the scratches you're about to try to remove. From there, the essential list looks like this:
- Iron remover spray to dissolve bonded brake dust and fallout
- Clay bar or clay mitt with dedicated lubricant
- A dual-action (DA) polisher, or hand applicator pads if working by hand
- Cutting compound and a separate finishing polish
- Cutting pads and softer finishing pads, kept separate to avoid cross-contamination
- Multiple microfiber towels, since reusing a dirty one just moves grit around
- An inspection light or work light for checking your progress under real brightness
- Isopropyl alcohol panel-wipe solution, diluted 10 to 20 percent
- Gloves and eye protection at minimum
A DA polisher runs $100 to $250 and pays for itself after two or three cars, but renting one for a single project is reasonable if you're not sure you'll use it again. Compound and polish brands vary widely in aggressiveness, and Chemical Guys is a familiar example of a brand that sells clearly labeled cutting compounds and finishing polishes, which makes it easier for a first-timer to match product to pad without guessing.
Pro Tip: Buy at least two of every pad type. A clogged pad stops cutting and starts smearing product around, and swapping to a clean one mid-panel saves you from redoing work.
Step-by-Step Oxidation Correction Workflow
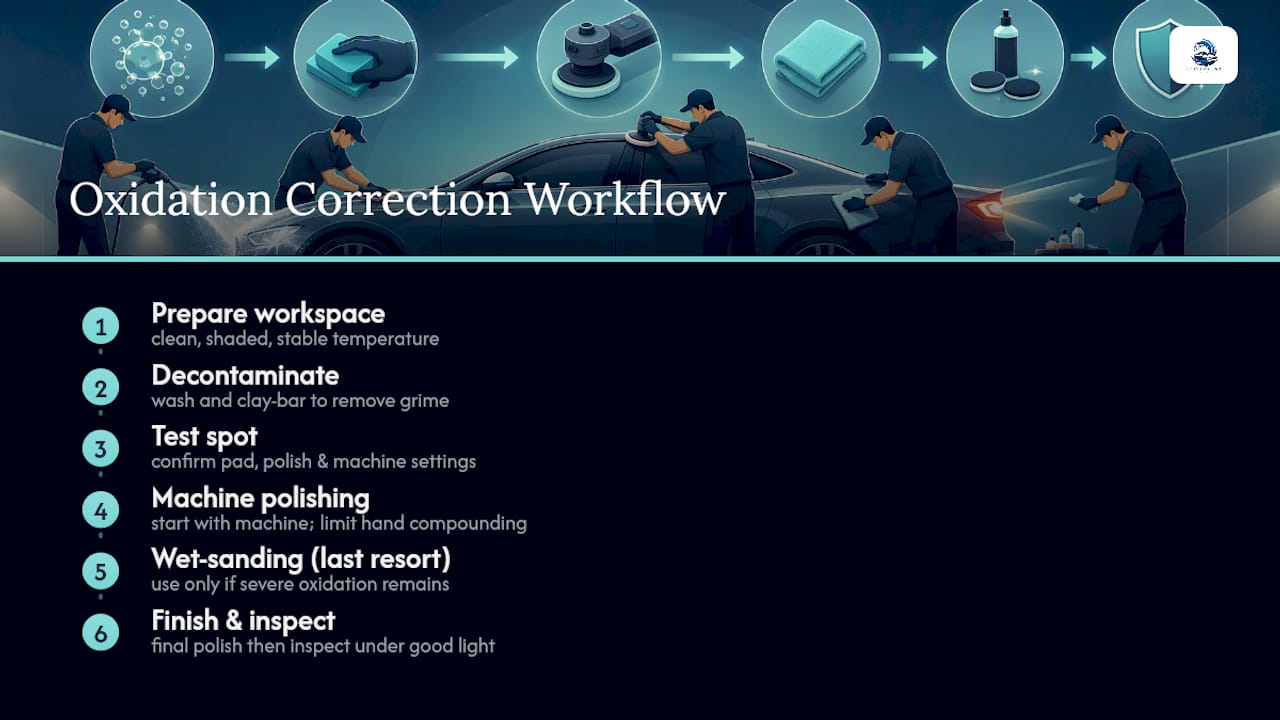
This is the order that actually works, in the sequence pros follow on every car, whether it's a daily driver with light haze or a neglected SUV that hasn't seen wax in three years.
Step 1: Prepare the workspace and the vehicle
Work in shade if you can get it, ideally a covered garage or carport, with the paint at a comfortable ambient temperature, roughly 60 to 80 degrees Fahrenheit. Direct sun causes products to dry too fast and makes it hard to judge results accurately. Wash and dry the entire vehicle using the two-bucket method: one bucket for clean soapy water, one for rinsing your wash mitt, so you're not dragging grit back across the paint. Mask off delicate trim, rubber seals, and any decals with painter's tape before you bring a polisher near them. If you have decals or graphics near a panel you're correcting, check how to remove or mask them safely rather than risking damage from an unmasked edge.
Step 2: Decontaminate before you cut anything
Spray on an iron remover and let it dwell per the label, watching for the purple "bleeding" reaction that shows it's dissolving bonded contamination. Rinse thoroughly, then clay the panel with a generous amount of lubricant, working in straight lines and folding the clay as it picks up grit. Iron remover and clay pull out embedded contaminants that washing alone leaves behind, and skipping this step means you'll be grinding those particles into the paint the moment you start compounding. Clay does not remove oxidation itself. It's prep work, not correction, but it's non-negotiable prep.
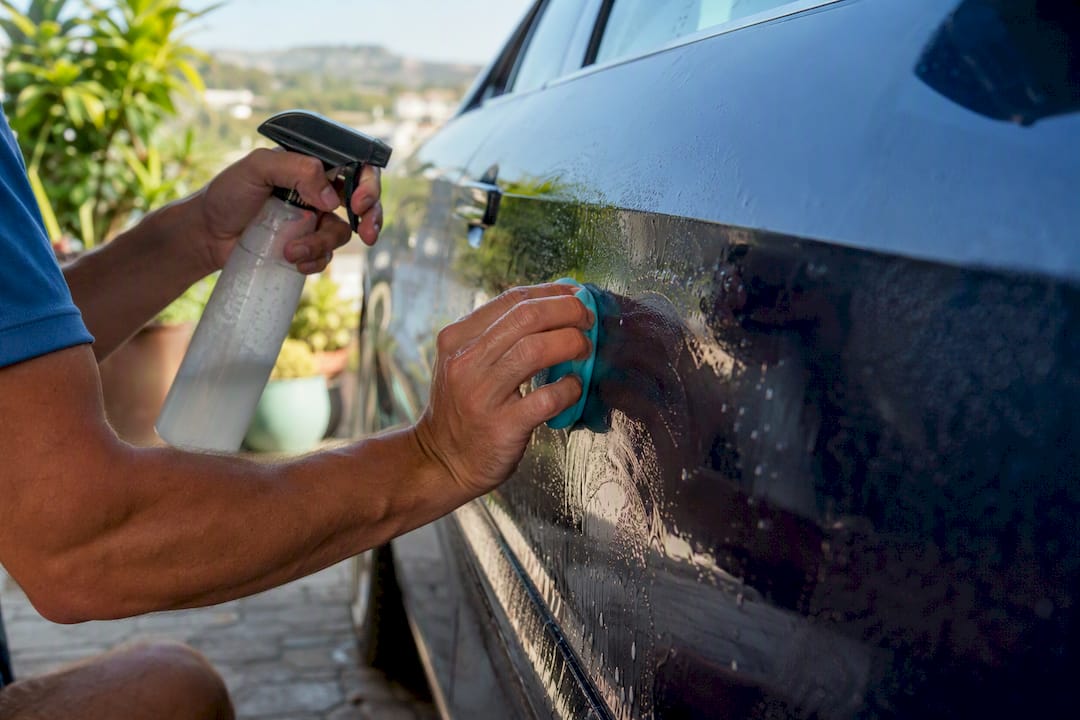
Pressure washing the whole car thoroughly before any paint work also matters more than most DIYers assume. Thorough pre-paint washing removes grit and grime that otherwise gets ground into the clear coat during correction, so don't rush the wash stage to get to the "real work" faster.
Step 3: Run a test spot before committing to a panel
Pick a small, manageable section, ideally somewhere less visible like a lower door panel, and start with your mildest pad and product combination. Starting with the least aggressive option and only escalating if the test spot fails protects the finite amount of clear coat you have to work with. If you don't know the car's paint history, a cheap paint-thickness gauge is worth the money. It tells you conservatively how much material you're working with before you commit a whole panel to a heavier compound.
Step 4A: The machine path with a dual-action polisher
A DA polisher is the right tool for whole-car correction, and it's what most detailers reach for over a rotary because it generates less risk of heat buildup and burning through the clear coat. Prime the pad with a few drops of compound, spread it across the section at low speed, then work it at a moderate speed, typically 4 to 5 on most machines, in slow overlapping passes. Keep sections to that same 2 foot by 2 foot size for even heat distribution and consistent pressure. Clean or swap pads every one or two panels, since a loaded pad stops cutting and starts just smearing residue.
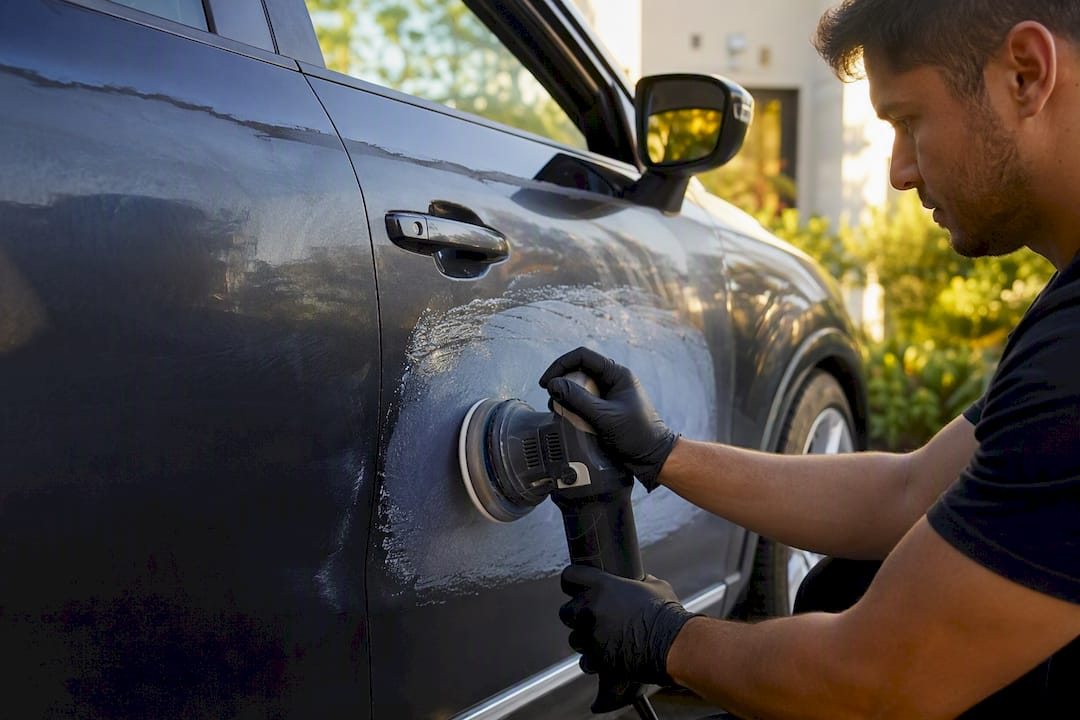
Step 4B: The hand path and its limits
Hand compounding works for small spots, touch-ups, or cars with only light haze, but it has a real ceiling. You can't generate the same consistent friction and heat a machine does, so moderate to heavy oxidation on a whole car by hand will take hours per panel and often falls short of what a DA polisher achieves in minutes. If you're two panels in and not seeing meaningful improvement, that's your signal to rent a polisher rather than keep grinding by hand.
Step 5: Wet-sanding, only as a last resort
Wet-sanding is for heavy, single-stage chalking or badly textured paint that compound alone won't touch. It should be reserved for experienced hands because it's easy to wreck a panel, using fine grit sandpaper, 2000 grit or finer, kept flooded with water at all times. Wear eye protection and a respirator if you're sanding for any length of time, since fine paint dust is not something you want to breathe. Wet-sanding always gets followed immediately by compounding and polishing, never left as a finished surface on its own.
Step 6: Refine with a finishing polish
Switch to a softer pad and a dedicated finishing polish to remove the fine marring the cutting stage leaves behind. This is where flat, dull paint turns into genuine depth and gloss. You'll know a refine pass worked when the haze that survived compounding disappears and the reflection sharpens under your work light.
Step 7: Wipe the panel down and inspect
This step gets skipped constantly, and it's the one that separates a real fix from a fake one. Polishing oils sit on the surface and create a temporary shine that hides leftover haze underneath. A diluted isopropyl alcohol wipe, roughly 10 to 20 percent, strips those oils away so you can see the true result under bright light. If haze remains, redo the correction pass only on that section, not the whole panel.
Step 8: Protect the surface immediately
Exposed paint oxidizes faster than paint that's never been touched, so don't leave a freshly corrected panel bare overnight. Apply your chosen protection within the hour: paste wax, a synthetic sealant, or a ceramic coating, in that order of increasing durability and cost.
- Keep pads clean between panels and replace ones that feel gummy or clogged
- Wear gloves throughout, and a respirator specifically for any sanding step
- Work in shade or a covered space to avoid flash-drying products mid-pass
When Does Oxidation Correction Stop Working?
Correction only works while clear coat or resin still exists to cut and polish. Once that layer is gone, mechanical correction has nothing left to work on, and further compounding just grinds bare paint.
If your test spot shows color transferring onto the pad, or the paint stays milky and blotchy no matter how much you polish, stop immediately. That's not a product problem. It's a sign the clear coat has already failed, and continuing will make the surface worse, not better.
Watch for these signs that mean repainting, not more polishing, is the answer:
- Clear coat peeling or lifting at panel edges
- A milky or white cast that doesn't clear up with polish
- Color coming up on your buffing pad during a test spot
- Deep, spreading edge lifting around trim or seams
Compounding over failed clear coat doesn't just fail to fix the problem, it often creates feathered, uneven edges around the damage that make a later repaint more expensive. A $20 paint-thickness gauge is cheap insurance against this exact mistake, especially on a used car with an unknown history.
When Should You Hire a Professional Detailer?
Hire a pro when you're facing whole-car moderate to heavy oxidation, evidence of a previous owner's aggressive polishing job, single-stage paint that's chalking (common on older vehicles without clear coat at all), or when you simply don't own a polisher and don't want to buy one for a single project. A professional correction typically includes a full wash, iron decontamination, machine compounding and polishing, an isopropyl alcohol panel-wipe to verify the result, and optional ceramic or sealant protection afterward. Expect a half day to a full day depending on how many panels need correction.
When you request a quote, ask specifically about these details:
- Whether they run a test spot before committing to the whole car
- Documented before-and-after photos of the work
- Whether wet-sanding is included or billed separately if it's needed
- What pad and product tiers they use for cutting versus finishing
- What protection options are available and their expected longevity
A mobile provider like Living Waters Auto Wash LLC performs the entire sequence at your driveway or office lot without needing your water or electricity. This matters if you don't have a shaded workspace at home to do this properly yourself.
Pro Tip: Ask any detailer, mobile or shop, what happens if the test spot reveals clear-coat failure. A pro who has a clear answer for that scenario has done this enough times to know the difference between correctable haze and a lost cause.
How Do You Prevent Oxidation From Coming Back?
Corrected paint is more vulnerable right after the process, not less, since you've just removed the protective layer that was there before. A simple maintenance rhythm keeps that new gloss from fading again within a season.
- Rinse weekly to keep loose contamination from bonding to the surface
- Reapply a light spray sealant monthly between full protection applications
- Renew your main protection on schedule: wax every few weeks, sealant every few months, ceramic per its rated lifespan
- Park in shade or a garage whenever it's an option, since UV exposure is the main driver of oxidation
- Keep a quick detail spray in the car for wiping down dust and light grime between full washes
Consistency matters more than any single premium product here. A cheap sealant reapplied on schedule beats an expensive ceramic coating neglected for two years.
A Mobile Detailer's Take on Doing This Right
The single most common DIY mistake isn't a bad product choice, it's skipping the test spot and jumping straight to a heavy cutting pad on the whole hood. Every pro who's corrected more than a handful of cars enforces the same discipline: test spot first, protect immediately after. Work one panel at a time, watch your pad for clogging, and use the shade and the cooler part of the day to keep the surface from flash-drying mid-pass.
Prefer to Book a Pro for Your Oxidation Correction?
If your car's oxidation is more than a light haze, or you'd rather skip the pad-swapping and test-spot guesswork, Living Waters Auto Wash LLC brings the entire correction process to your driveway or office parking lot. No hose, no outlet, no trip to a shop.

A mobile visit for oxidation correction typically includes an on-site diagnosis, a test spot to confirm the right approach for your paint, full compound-and-polish correction, and optional wet-sanding quoted separately if your car needs it. You'll get before-and-after photos so you can see exactly what changed. Before the visit, just clear personal items from the car, make sure there's reasonable access to park, and expect the appointment to run a few hours depending on how many panels need work. Living Waters Auto Wash LLC serves Boca Raton, Pompano Beach, Coral Springs, Parkland, and the rest of Palm Beach County with an eco-conscious, no-hookup process and a track record backed by 5-star local reviews. Book your mobile detailing appointment and get your paint corrected without ever leaving your driveway.
Frequently Asked Questions
Can you remove oxidation from car paint without a polisher? Yes, for light haze on a small area. Hand compounding lacks the consistent friction a DA polisher generates, so moderate to heavy oxidation across a whole car is faster and more effective with a machine.
How do you know if oxidation correction actually worked? Wipe the section with diluted isopropyl alcohol after polishing and inspect it under bright light. If the haze is gone once the polish oils are stripped away, the correction held.
Is compounding safe for every car's paint? No. Compounding removes a microscopic layer of material, and clear coat thickness is finite. A test spot and, ideally, a paint-thickness gauge tell you whether your car has enough material left to correct safely.
What's the difference between wax, sealant, and ceramic coating for protection? Paste wax lasts weeks, synthetic sealant lasts several months, and ceramic coating can last a year or more with proper maintenance. Each is a reasonable choice depending on how long you want the protection to hold.
When should you stop DIY correction and call a professional? Stop when a test spot shows color transferring to the pad, the clear coat looks milky or is peeling, or you've spent hours on a panel without visible improvement. Those are signs the paint needs professional evaluation or a repaint.
Sources
- Remove Oxidation From Car Paint: By Hand or Machine (CarCareTruth)
- Why You Shouldn’t Do an IPA Wipe Down (Dr. Beasley’s blog)
- How to Remove Oxidation From Paint: A DIY Guide (GP Mobile Car Wash)
- Isopropyl alcohol car detailing use cases (Super Ceramic Coating)