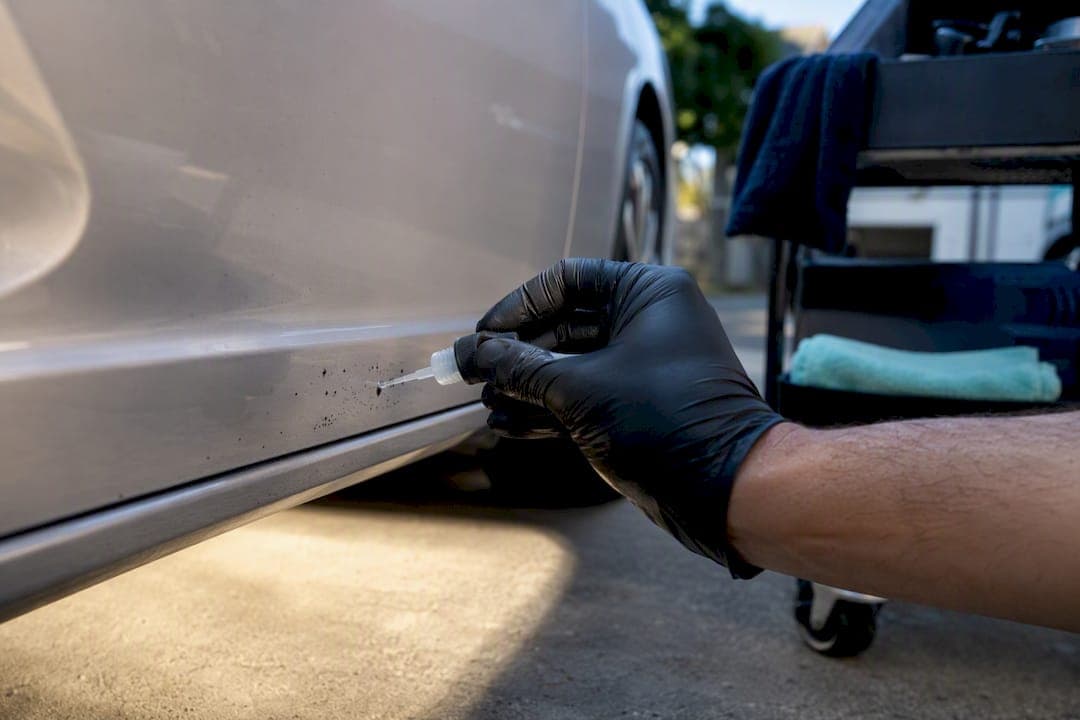
The safest way to handle tar removal on car paint is to use a dedicated automotive tar remover, let it dwell on the spot, then lift the loosened residue with a clean microfiber towel instead of scrubbing. Wash the panel first, treat the tar chemically, and reapply wax or sealant afterward since the remover strips it away. For thick, baked-on tar covering large panels, a professional mobile detailer has the tools to finish the job without risking the clear coat.
TL;DR:
- Use a dedicated automotive tar remover, apply it carefully by letting it dwell for 30 seconds to five minutes depending on tar thickness, then lift with a microfiber towel.
- Always pre-wash the car with a two-bucket system to prevent grit from scratching the clear coat during tar removal.
- Use citrus-based formulas for gentle, paint-safe dissolving, and avoid household oils or solvents like gasoline, which risk damaging your paint.
- If tar remains after chemical treatment, clay decontamination with proper lubrication is necessary to avoid clear coat damage from aggressive scrubbing.
- Schedule professional mobile detailing for heavily baked-on tar, especially on single-stage or delicate paints, to prevent costly damage during DIY removal.
Table of Contents
- Step-by-Step: The Paint-Safe Method Using a Dedicated Tar Remover
- Which Products Actually Dissolve Tar Safely?
- Do Household Fixes Like WD-40 or Peanut Butter Actually Work?
- What if the Tar Won't Come off With Solvent Alone?
- Safety Checks That Prevent Permanent Paint Damage
- How to Keep Tar From Sticking to Your Paint Again
- What Mobile Detailers See That DIYers Usually Miss
- When It's Time to Call a Mobile Detailing Pro
- Sources
Step-by-Step: The Paint-Safe Method Using a Dedicated Tar Remover
Grit is the real enemy here, not the tar itself. Road tar picks up dirt, brake dust, and tiny stone fragments as it splatters off the highway, and if you go at it with a towel before washing, you're grinding sandpaper into your clear coat. That's how a five-minute tar spot turns into a permanent swirl mark.
Here's the sequence detailers actually follow, and it's the same one AutoDetailPedia lays out as the standard four-phase approach: pre-wash, apply solvent, lift residue, then clay-bar if anything's left behind.
- Pre-wash the car. Use the two-bucket method or a foam pre-wash to strip away loose dirt and grit around the tar spots. Skipping this step is the single most common mistake DIYers make, and it's the one that causes scratches later.
- Test patch first. Spray a small amount of your chosen tar remover on a hidden spot, like inside a wheel arch or on the fuel flap, and wait a few minutes to check for discoloration or haze. This step matters more on older paint, matte finishes, or anything with a vinyl wrap, where a formula that's perfectly fine on factory clear coat can cause real damage. AutoDetailPedia specifically recommends this test before touching visible panels.
- Apply the tar remover. Hold the bottle a few inches from the surface and spray directly onto the tar spot, covering it fully without soaking the surrounding paint.
- Let it dwell. Dwell time varies by formula, ranging from about 30 seconds for lighter, fresher tar to 5 minutes for thicker or older deposits, according to J.D. Power's tar removal guide. Don't rush this part. The solvent needs time to break the tar's bond with the paint.
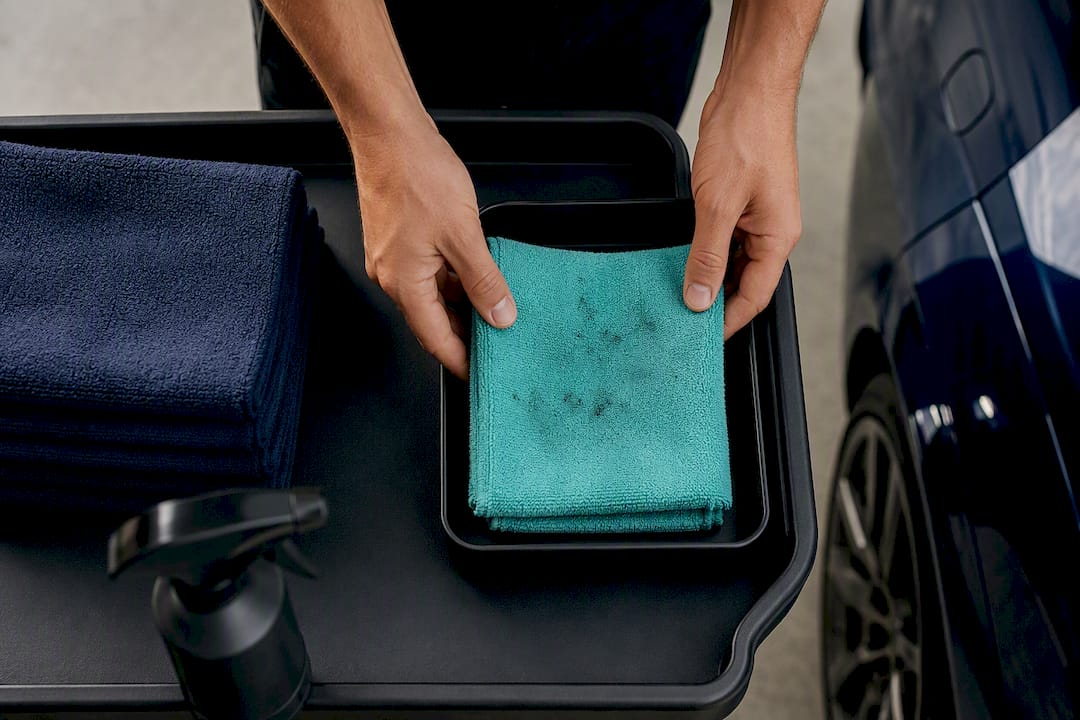
- Lift with a clean microfiber. Wipe gently in one direction, don't circle or scrub. The tar should come away in soft dark streaks on the towel, not stick stubbornly to the paint.
- Rinse and inspect. Rinse the area with plain water and check under good light. If any tar remains, repeat the cycle rather than pressing harder.
- Reapply protection. Once the spot is clean and dry, restore wax or sealant to the treated area so it matches the rest of the panel.
If you've gone through two or three treatment cycles and the tar still feels raised or gritty under a fingertip, that's your cue to move past chemical treatment alone and bring in a clay bar, which we'll cover in a later section.
Pro Tip: Keep a separate, color-coded microfiber towel just for tar work. Tar residue is nearly impossible to fully wash out of a towel, and using that same towel later on a finished panel can drag contamination right back onto clean paint.
One detail people overlook: panel temperature matters as much as technique. A tar remover applied to a hood that's been baking in the sun evaporates before it can dwell properly, and it can also cause streaking on hot clear coat. Move the car into shade, or wait for the metal to cool, before you start. For a broader refresher on prep steps that make paint correction easier down the line, this exterior detailing checklist covers the full pre-wash routine in more detail.
Which Products Actually Dissolve Tar Safely?
Not all tar removers are built the same, and the difference comes down to what's doing the dissolving. Most fall into three chemistry categories, and knowing which one you're spraying matters for both effectiveness and paint safety.
- Citrus-based formulas (d-Limonene). These use citrus oil extracts to break down tar's sticky compounds. They tend to smell better, work gently, and are generally considered safer around trim and plastics, though Gtechniq's product notes still caution against spraying raw plastic or paint protection film directly, since even citrus solvents can cause staining or clouding on unsealed substrates.
- Petroleum distillate formulas. These are stronger and faster acting, which makes them effective on thick or aged tar, but they carry more risk on sensitive surfaces like matte paint finishes or unsealed vinyl wraps.
- Foaming surfactant sprays. Marketed as bug-and-tar removers, these work best on fresher, lighter contamination rather than the thick vertical streaks you get from a summer of highway driving.
J.D. Power's guide notes that foam-based bug and tar sprays suit fresh splatter, while solvent or gel-based removers are better matched to thicker, baked-on spots that have had weeks to harden. Gel formulas cling to vertical panels longer than a thin spray, giving the solvent more dwell time exactly where you need it.
What compatibility actually means for your car: A product that is safe on glossy factory paint isn't automatically safe on PPF, ceramic-coated panels, or matte wraps. Always check the label for substrate warnings, and when in doubt, test on the least visible panel you have.
Cleanup after any solvent treatment follows the same rule regardless of which chemistry you picked. A single wash rarely removes every trace of the product, and leftover residue can interfere with wax adhesion or attract dust. Wash the treated panel twice, once to lift the bulk of the product and grime, and a second pass with a dedicated car shampoo to make sure the surface is genuinely clean before you reapply protection. If you're unsure which formula works with a wrap or ceramic coating on your vehicle, this guide to paint-safe detailing products breaks down compatibility by surface type.
Do Household Fixes Like WD-40 or Peanut Butter Actually Work?
They can work, and they're worth knowing for the times you're stuck without a proper tar remover in the garage. But each one comes with a trade-off that a dedicated product doesn't have.
- WD-40. The oils in WD-40 penetrate tar the same way a purpose-built remover does. Spray it on, let it sit for a couple of minutes, then wipe with a microfiber. The catch is that WD-40 strips wax on contact, so plan on a full double wash afterward to remove both the tar and the oily film it leaves behind, a point Daily Car Tips makes clear in its own testing notes.
- Goo Gone. Works on a similar principle to WD-40 and is formulated specifically for sticky residues, making it a reasonable middle ground between a household product and a dedicated automotive remover. Same rule applies: wash it off thoroughly, don't let it sit under the sun.
- Peanut butter. This sounds like an internet myth, but the oil content genuinely softens tar. Smear a small amount directly on the spot, let it sit for several minutes, then wipe clean. The downsides are real, though: it smells, it's messy, and the residual oil can attract dust if you don't wash it off promptly.
- Cooking oil. Works on the same oil-penetration principle as peanut butter, with less mess and no lingering odor. It's slower than a commercial remover but a fine emergency option.
None of these matches the speed of a purpose-made remover, and Daily Car Tips notes that household oils typically need more dwell time to match what a dedicated formula does in under five minutes. That's a fair trade if you're dealing with one small spot and nothing in the garage.
What you should never reach for: gasoline, acetone, or lacquer thinner. These solvents are aggressive enough to strip clear coat, cause discoloration, and in some cases eat straight through factory paint. They show up in enough online "hacks" that it's worth saying plainly: don't use them, even as a last resort.
If you're dealing with more than a spot or two, or the tar has been baked on for weeks, skip the kitchen cabinet and use a proper automotive tar remover. Household fixes are for emergencies, not routine maintenance.
What if the Tar Won't Come off With Solvent Alone?
Run your fingertips lightly over a treated spot with your eyes closed. If the paint still feels gritty or slightly raised even after a chemical treatment lifted the visible tar, you've got bonded residue sitting in the clear coat's texture, not just on top of it. A plastic sandwich bag over your hand works as a simple substitute for a bare finger if you want a cleaner read on texture without touching the paint directly.
That's your signal to move to clay.
- Lubricate the panel. Spray a dedicated clay lubricant or a diluted quick detailer generously over the section you're working on. Clay should never touch dry paint.
- Knead and fold your clay bar. Work it into a flat pad, gliding it back and forth across the lubricated surface with light pressure, letting the clay pull embedded contaminants out of the clear coat.
- Fold and inspect often. Once a section of the clay picks up grit, fold it over to expose a clean face. If you ever drop the clay bar on the ground, throw it out. Reusing it risks dragging a picked-up pebble across your paint.
- Wipe and re-inspect. After claying, wipe the panel down and run your fingers over it again. It should feel glass smooth.
Compounding or machine polishing comes next if the clay reveals swirl marks or light etching left behind by the tar or an earlier scrubbing attempt. This is where DIY risk climbs fast. A rotary or dual-action polisher in inexperienced hands can burn through clear coat in seconds, especially on edges and raised body lines. AutoDetailPedia points out that skipping steps in this progressive process, jumping straight to compounding without proper clay decontamination first, is what drives up the risk of visible scratching.
Pro Tip: If you're staring at a hood covered in months of baked-on tar spots, or the paint is single-stage rather than clear coat over base color, that's the moment to call a professional rather than experiment. Single-stage paint has zero protective clear layer, and a mistake there isn't buffable out the way a clear coat scratch often is.
Safety Checks That Prevent Permanent Paint Damage
A few habits separate a clean tar removal job from an accidental paint repair bill.
- Work in the shade, on a cool panel. Hot metal evaporates solvents too fast for proper dwell time and can cause streaking that's harder to fix than the tar was.
- Wear gloves and eye protection. Tar removers are solvents, and some formulas cause skin irritation with repeated contact.
- Test patch before you commit. A hidden section, like the inside of a wheel arch, tells you in two minutes whether a product is safe for your specific paint or wrap.
- Never spray solvent directly onto trim, PPF, or raw plastic unless the label specifically confirms compatibility. Spray a towel instead and wipe those areas by hand.
- Let chemistry do the work, not your arm. Duel Auto Care's guide points out that tar often contains embedded grit, and mechanical scrubbing without proper chemical breakdown first grinds that grit straight into the clear coat.
- Rinse thoroughly and reapply protection to any spot you've treated. Bare paint left unprotected, even for a day, attracts new contamination faster than a waxed surface would.
How to Keep Tar From Sticking to Your Paint Again
Every tar remover that actually works also strips away whatever wax or sealant was sitting on that spot. That's not a flaw in the product. It's simply how the chemistry breaks tar's bond with paint, and it means the treated area is now bare and vulnerable the moment you rinse it clean.
Reapplying protection isn't optional cleanup. It's the step that determines whether tar bonds just as easily to that same spot next week.
- Spray wax. Fastest option, applied in minutes, but it typically lasts only a few weeks before it needs a refresh.
- Synthetic sealant. A stronger, longer-lasting layer that generally holds up for a few months and gives noticeably better resistance to new tar and road grime sticking.
- Ceramic coating. The longest-lasting option, professionally applied, that creates a slick surface tar has a much harder time bonding to in the first place.
A practical maintenance rhythm: reapply sealant regularly on panels that see frequent tar exposure, particularly the lower doors, rocker panels, and rear bumper. Keep a bottle of quick detailer and a small tar remover in the trunk. Catching a fresh splatter within a day or two, while it's still soft, takes a fraction of the effort that a month-old, sun-baked spot demands. For more on how ongoing protection ties into long-term paint condition, this breakdown of how exterior detailing protects paint covers the maintenance side in depth. And when you're rinsing off any treated panel, using a proper pre-wash and rinse technique helps avoid trading tar spots for water spot etching on the same afternoon.
What Mobile Detailers See That DIYers Usually Miss
Tar spots rarely show up alone. Most vehicles we treat have a mix of ages on the same bumper, some splatter from last week, some baked on since spring, and each one needs a slightly different dwell time to lift cleanly. That variation is one reason a single spray-and-wipe pass often leaves a few spots looking treated and a few looking untouched.
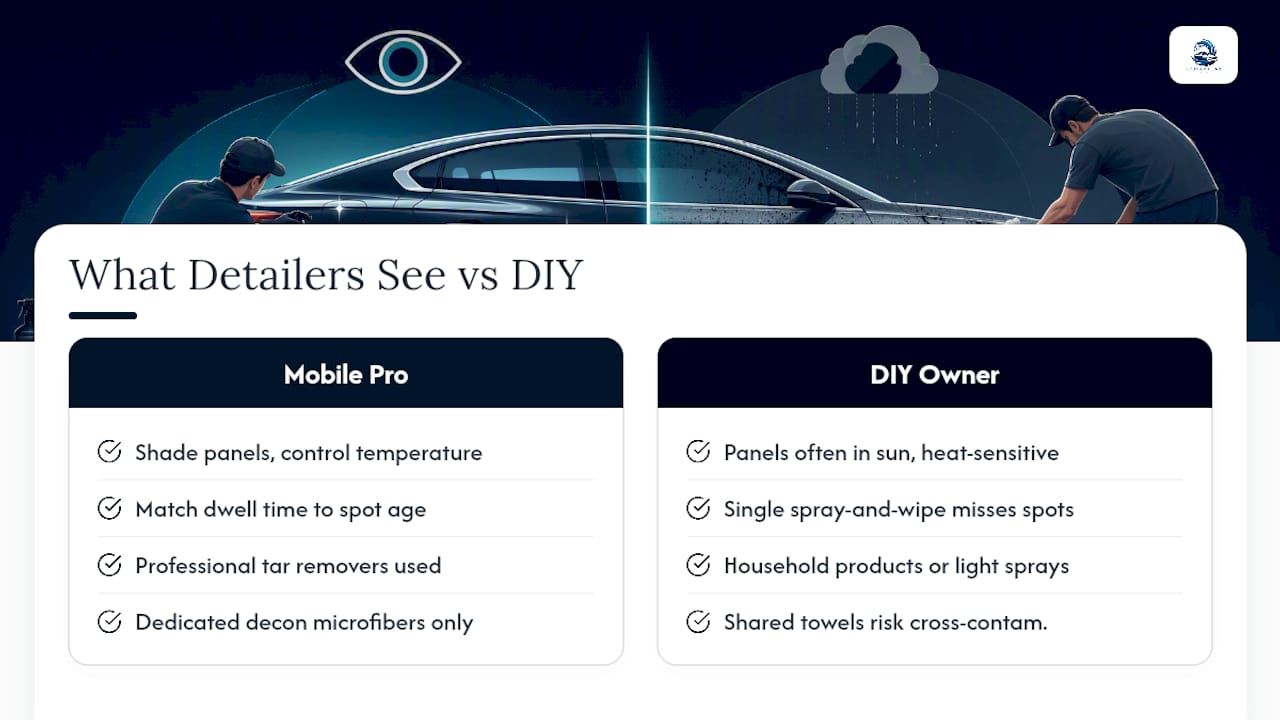
Working on-site changes the approach in a few concrete ways. Panels can be shaded and kept at a workable temperature regardless of where the car is parked, which matters more than most owners realize since heat ruins dwell time fast. Professional-grade tar removers, paired with proper clay lubricant and color-coded microfibers dedicated solely to decontamination work, keep contaminated towels away from finishing cloths entirely. Nitrile gloves stay on through the whole process, both for safety and to avoid transferring oil from skin onto a freshly clayed panel.
The honest limit of DIY isn't ability. It's equipment and repetition. A mobile detailing team handles tar-heavy vehicles often enough to recognize which spots need five minutes of dwell versus which ones need a second full treatment cycle, and that judgment comes from doing the job on dozens of different paint conditions, not from a single weekend project.
— Living
When It's Time to Call a Mobile Detailing Pro
If you're staring at a bumper covered in a season's worth of tar, or you're not sure whether your paint can handle a stronger solvent, that's exactly the job a professional mobile detailing service is built for. Such services often bring professional-grade tar removers, clay decontamination tools, and trained technicians directly to your driveway, without requiring water or power hookups on your end.

DIY works fine for a fresh spot or two caught early. Where it gets risky is large-area coverage, tar that's been baked on for months, single-stage paint with no clear coat buffer, or simply not being sure which product is safe for your specific finish. That's the point where a mistake costs more than the professional service would have.
A professional mobile detailing service's on-site process can handle the full decontamination and protection cycle in one visit, restoring wax or sealant so the treated panels don't just look clean but stay protected. Schedule a mobile detailing appointment and get your car's paint back to its pre-tar condition without spending your weekend on it.
Sources
The dwell times, product chemistry notes, and step sequences in this guide draw from a handful of detailing-industry sources worth bookmarking. J.D. Power's tar removal guide breaks down product categories and realistic dwell windows. Gtechniq's product page explains citrus versus petroleum-distillate chemistry and substrate warnings. AutoDetailPedia lays out the full four-phase removal process, including when clay and polishing enter the picture. Daily Car Tips covers household alternatives and their trade-offs in more detail than most product guides bother with. Duel Auto Care offers a clear explanation of why scrubbing tar grit damages clear coat.
- How to Get Tar off Your Car
- How to Remove Tar from a Car (Without Wrecking Your Paint) - Daily Car Tips
- How Do You Get Tar Off Car Paint Without Damaging the Clear Coat? - AutoDetailPedia